
Upcoming deadlines
Submission deadline for v2027: 15 January 2027
Quality control deadline for v2027: 19 March 2027
Scheduled SOCATv2027 release: June 2027
Get a quick overview of the procedure by watching the video below.
Notes :
-
-
-
-
- Data submissions are accepted throughout the year. Submitting data continuously helps reduce pressure on the submission and processing interface. However, only datasets submitted before the January deadline will be quality-controlled (QCed) and released in the same calendar year. Datasets submitted after the deadline will be processed and released in the year after.
- Any new datasets you submit remain yours.
- The SOCAT metadata requirements are detailed in the SOCAT cookbook (link below). Please, use this guidance for providing metadata information. SOCAT accepts metadata in any format (OME, pdf, etc). SOCAT encourages data providers to use the online metadata editor provided by PMEL to generate the latest metadata format.
- If this is your first time uploading data, we strongly encourage you to read this document, as it offers more comprehensive information than the brief steps outlined on this page.
- Find more details on the submission process here (PDF) > How to submit datasets.
-
-
-
Useful links :
Step 1: Pre-submission checks
The data file you upload to the Dashboard from the “Upload Data” page, must be either a file of tab-separated values (“TSV” format) or comma-separated values (“CSV” format). This data file has the general format:
- a line of metadata for each metadata item,
- a line of data column headers,
- a line of data column units (optional),
- a line of data values for each data sample
The expocode, vessel (ship) name, and investigator name(s) for the dataset must be given in either the metadata lines at the beginning or in columns with appropriate names.
The following is the start of an acceptable CSV file with units as part of the column name header line. The data header and data values lines were truncated to make it easier to see the format.
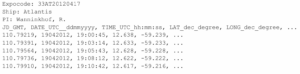
The following is the start of another acceptable CSV file which has units as a second header line and uses a slightly different format for the lines of metadata.
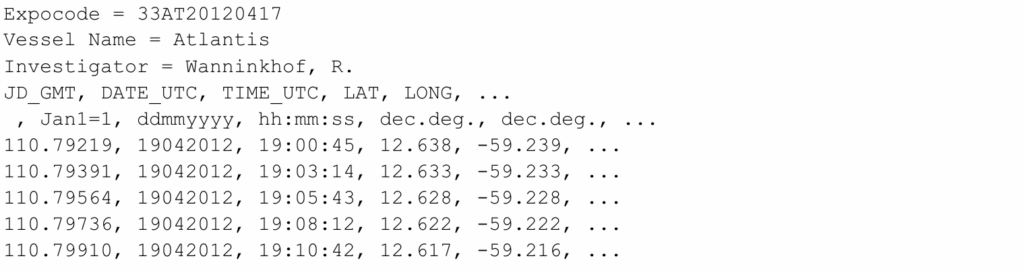
Tags for metadata items are case insensitive. The tag is followed by either a colon or equals sign, which can have spaces around them. For datasets with multiple investigators, put all names on one metadata line and separate the names with semicolons. If metadata is contained in data columns, the header for the data column should be one of these tags (see table below).
| Object | Accepted terms |
| Expocode | Expocode Cruise expocode |
| Ship | Ship Ship name Vessel Vessel name |
| Investigator name | Investigator Investigators Investigator name Investigator names PI PIs PI name PI names |
The first line of comma-separated (for CSV format) or tab-separated (for TSV format) values without any blank or numeric entries will be considered the line of data column headers . If the line following the header line has no numeric entries, it will be treated as a line of data column units; otherwise it will be the first data sample line. Any lines with no values (all blank values) will be ignored.
When you upload your data file, the Dashboard will examine it and attempt to identify the column header names and units.
First of all, you need an account to log in to the SOCAT Upload Dashboard. If you don’t have one, please request an account to oar.pmel.socat.support@noaa.gov, and wait for confirmation.
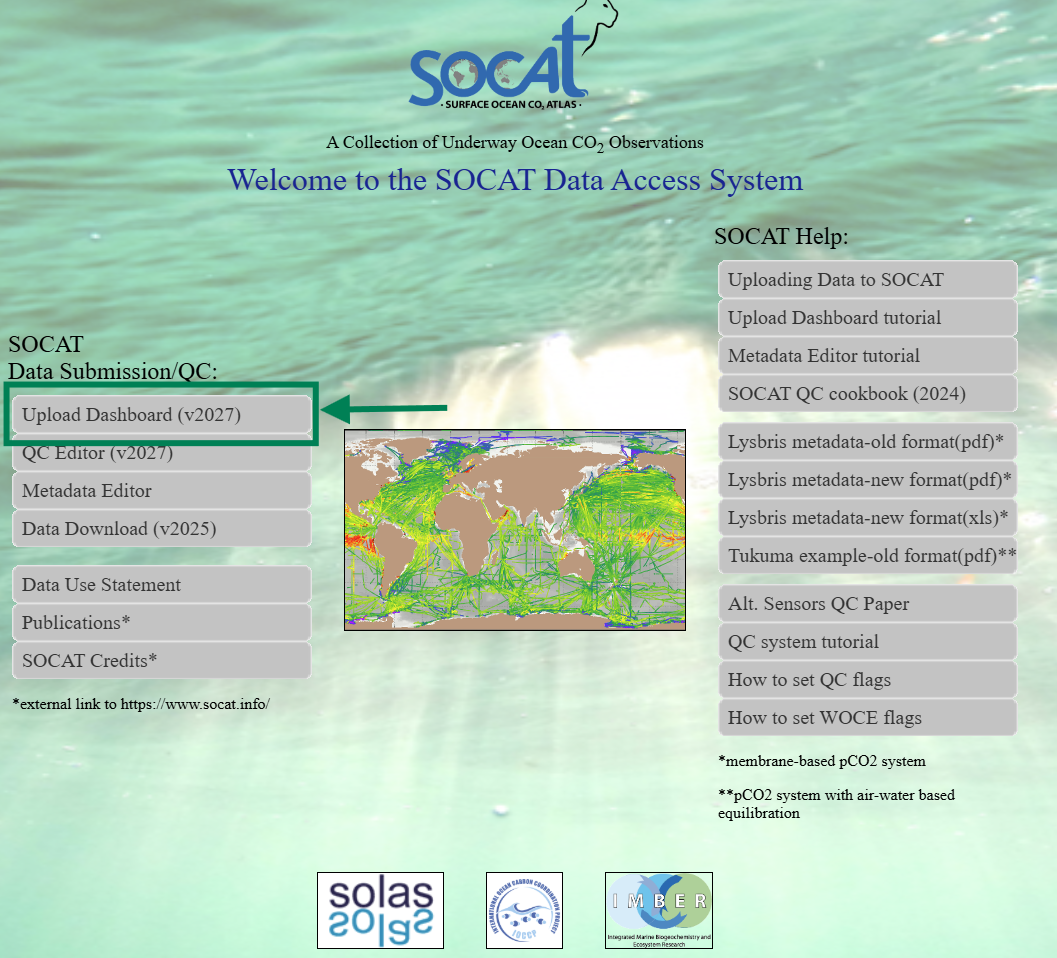
With your account, please log in to access the SOCAT Data Access System (LAS) : http://socat-remote.pmel.noaa.gov/. On the left, click on “Upload Dashboard (v….)”.
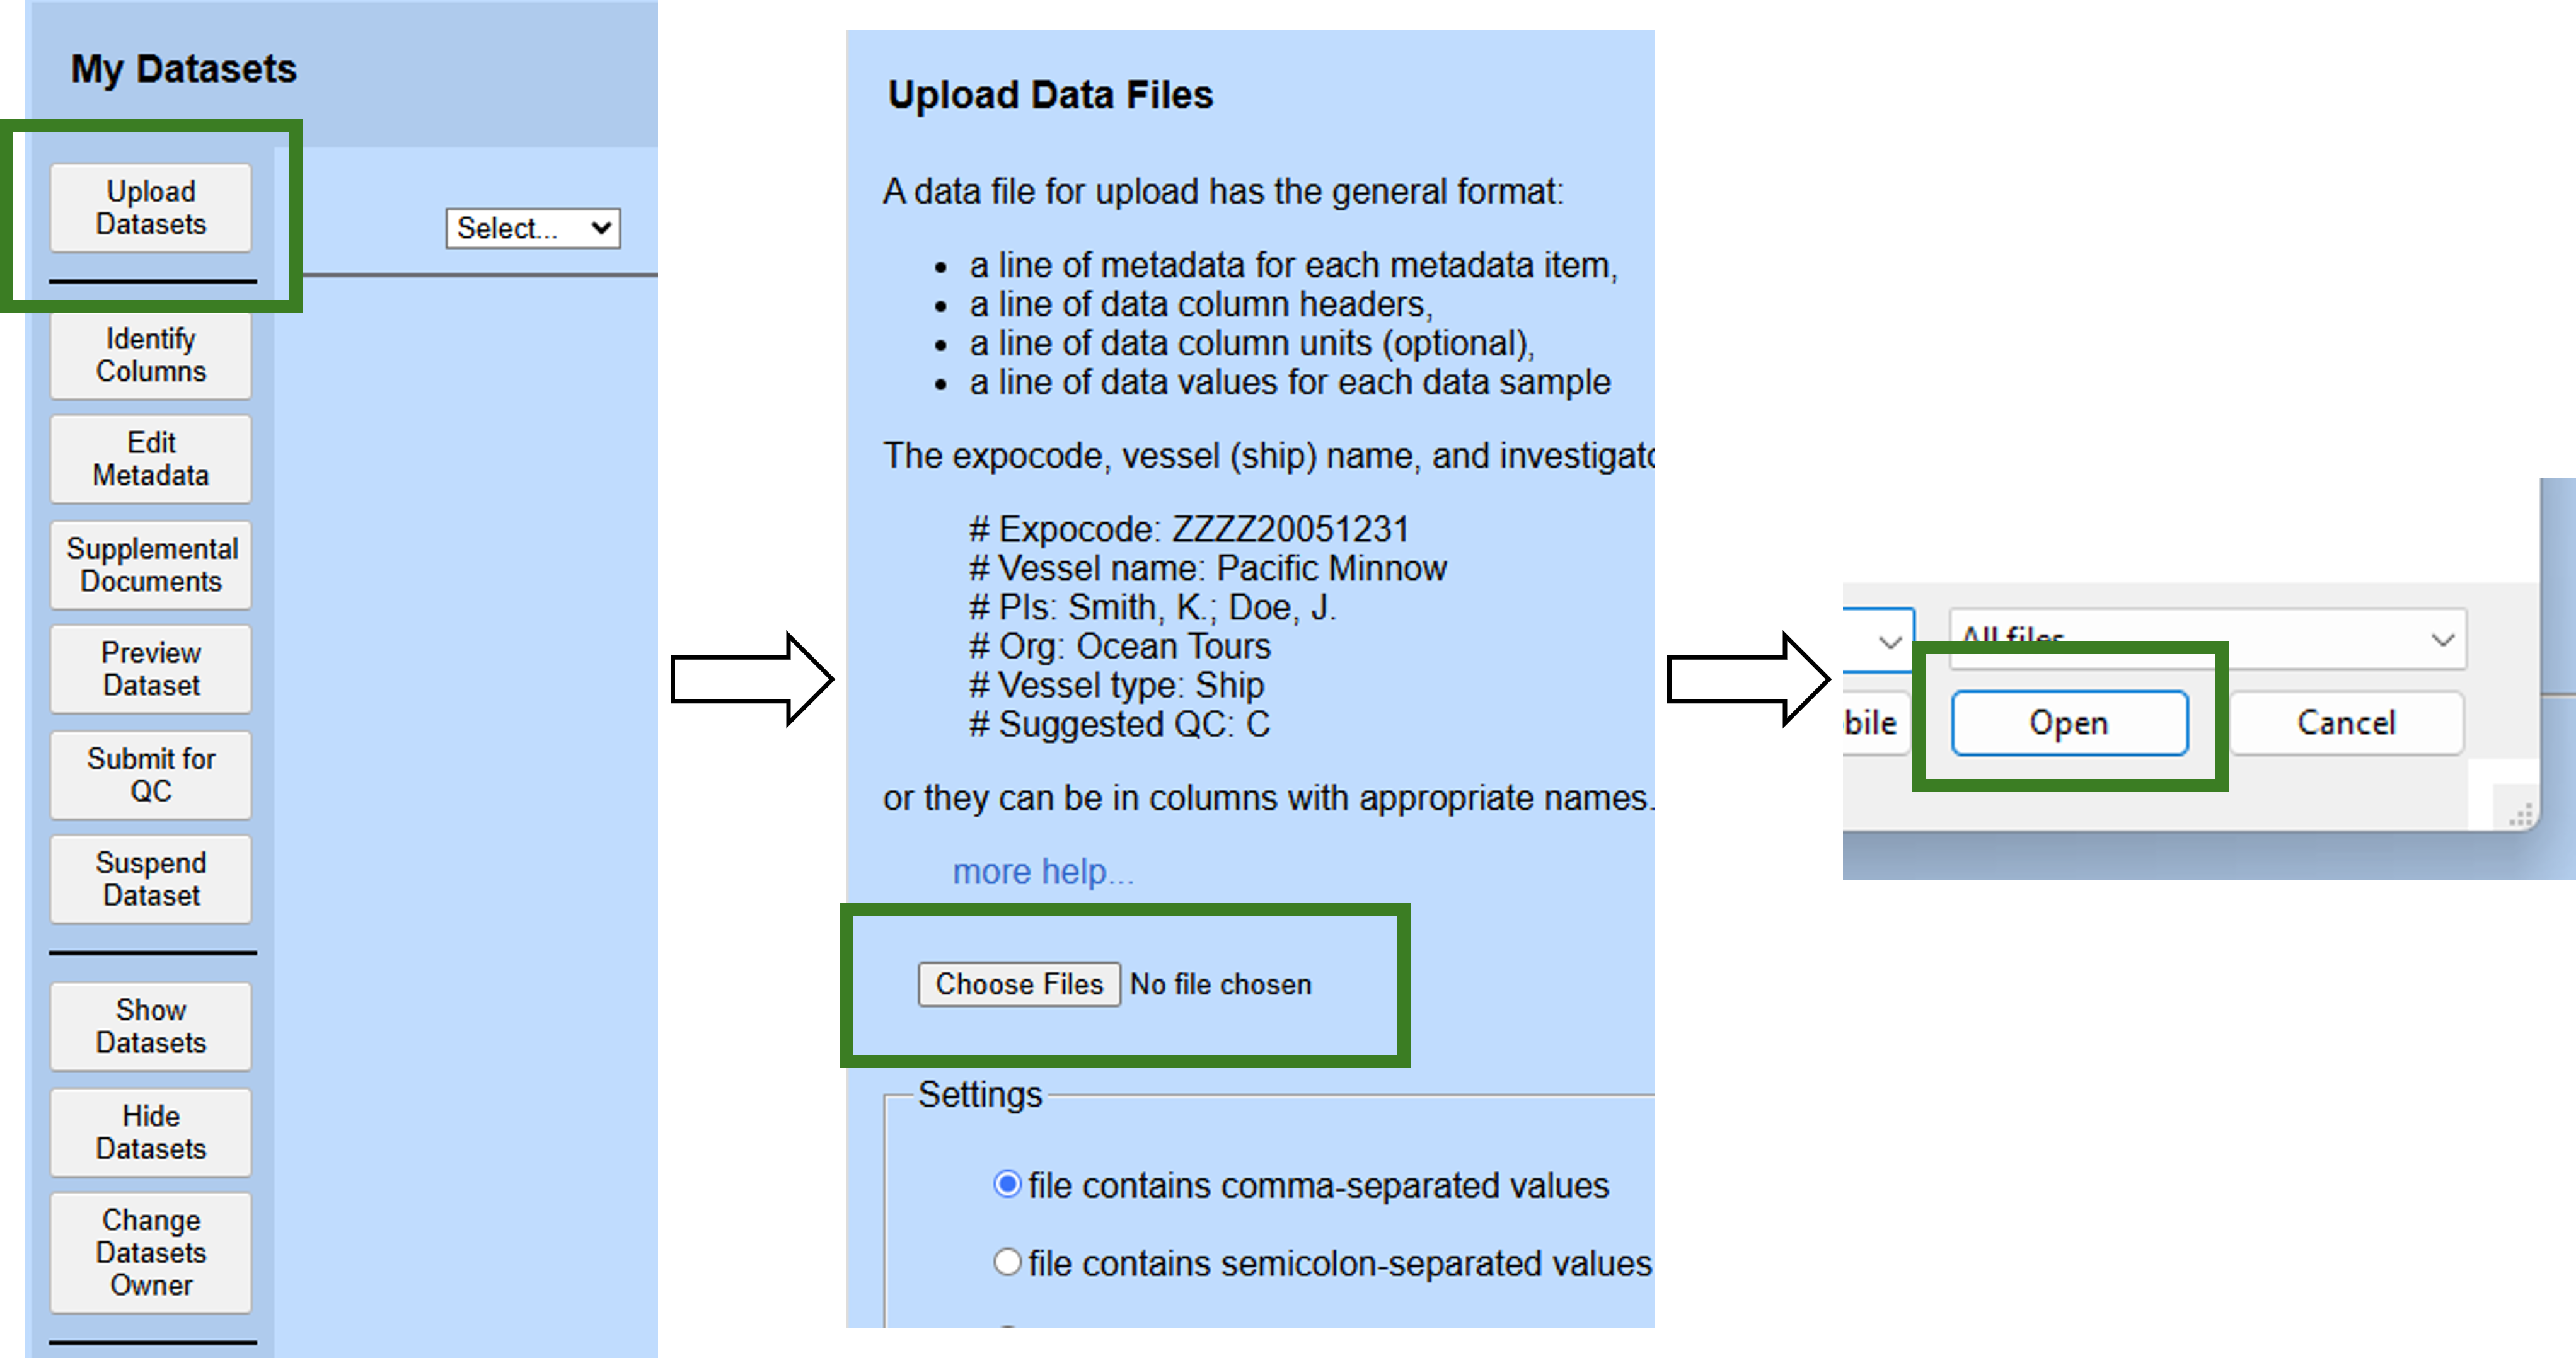
In the menu on the left, please select “Upload Dataset”. On the new page, click “Browse” and navigate to the folder containing your dataset(s) (accepted formats : csv or tsv). After selected the relevant document(s), click “open” in the lower-right corner of the window.
The main page of the Dashboard lists all cruises that belong to you. If you have not uploaded any datasets, your list may be empty, or it may contain SOCAT v3 (and earlier) datasets that were marked as belonging to you.
Tip : You can select/upload one or several cruises at the same time.
Back on the dashboard, you can now preview the data. Click “Advanced options”, scroll down and select “Preview Data File”. The first lines of your dataset should be displayed. If the preview is correct, please proceed with the next steps. If it is incorrect, please review your dataset locally on your computer, apply the necessary corrections, and upload the updated file to the Dashboard. Repeat this process until the preview displays correctly.
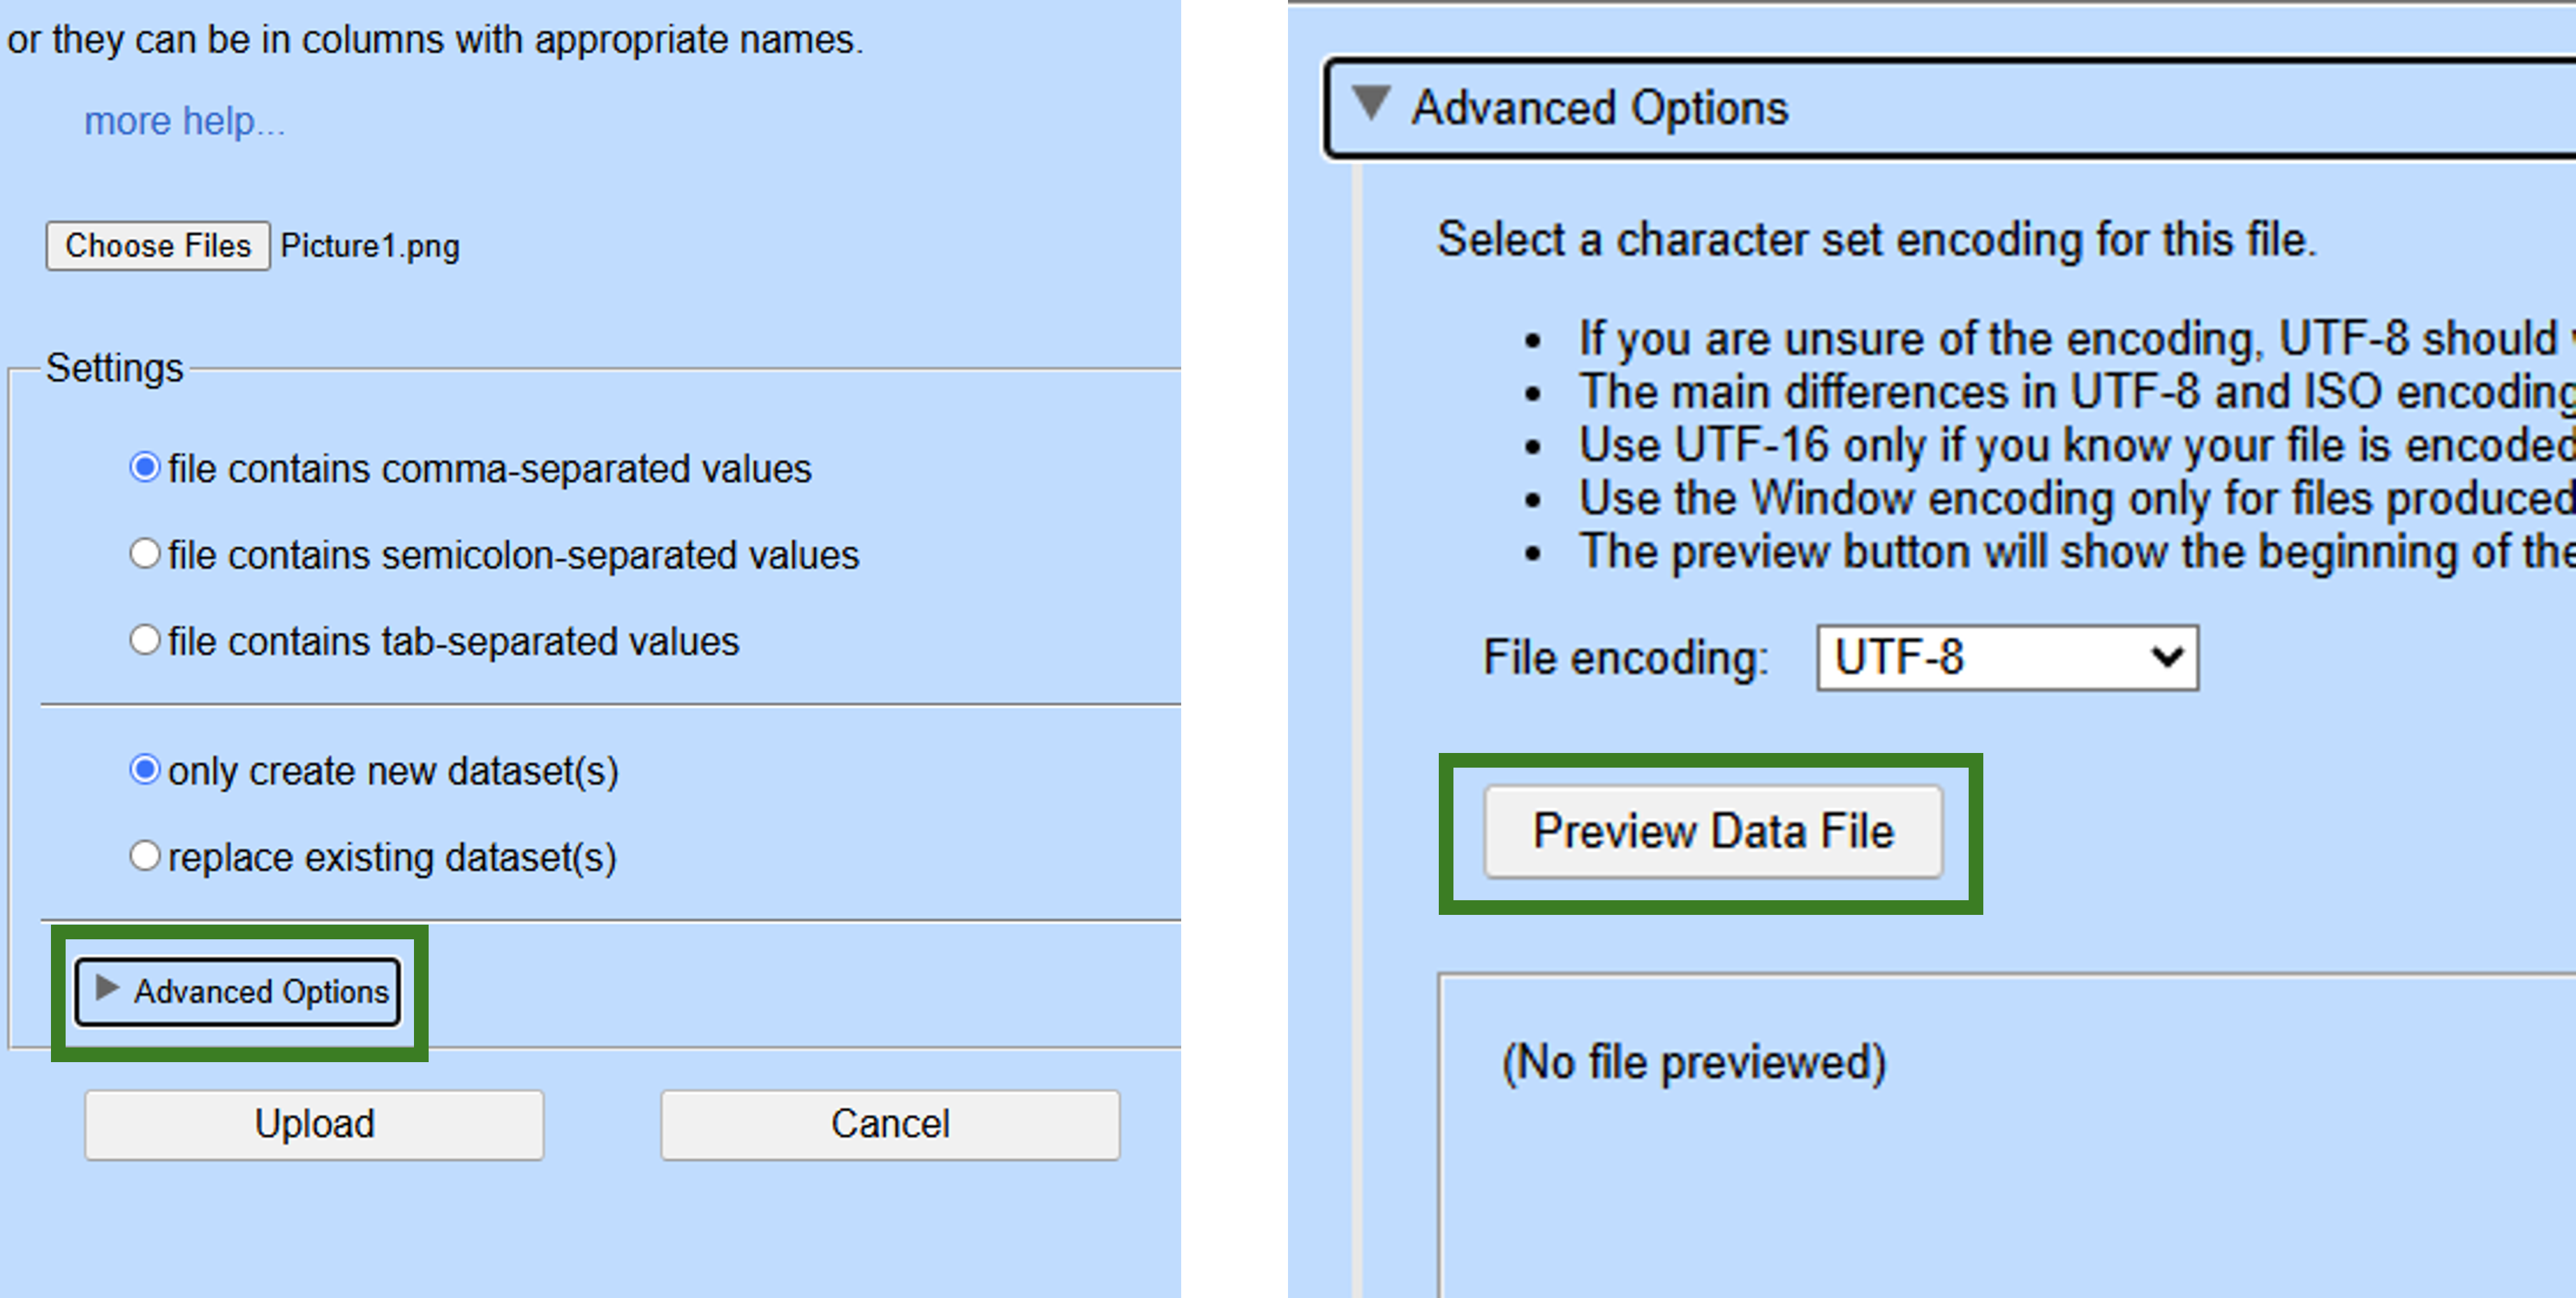
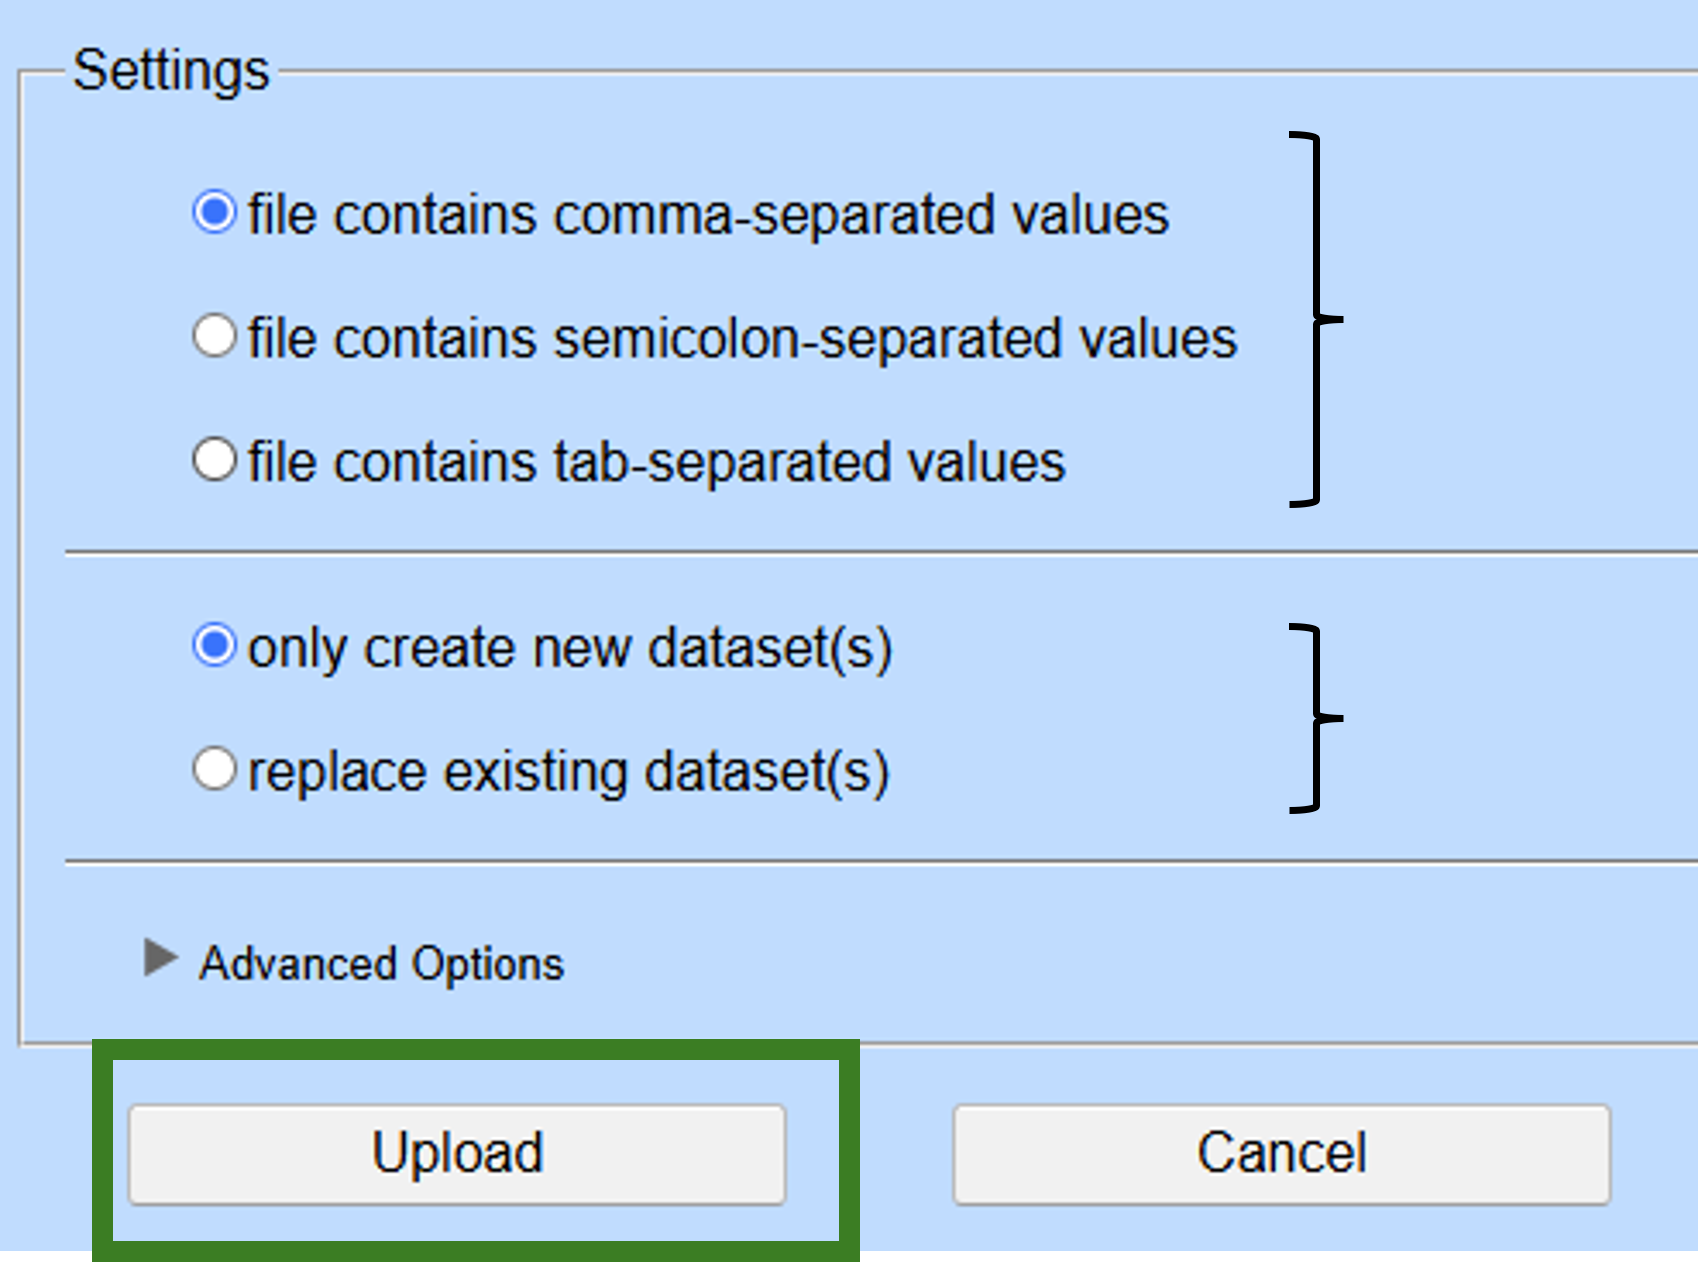
If the preview appears correct, scroll back up and select the appropriate options describing the dataset format (csv or tsv) and indicate whether this dataset already exists in the database or represent a new submission. Click “upload”.
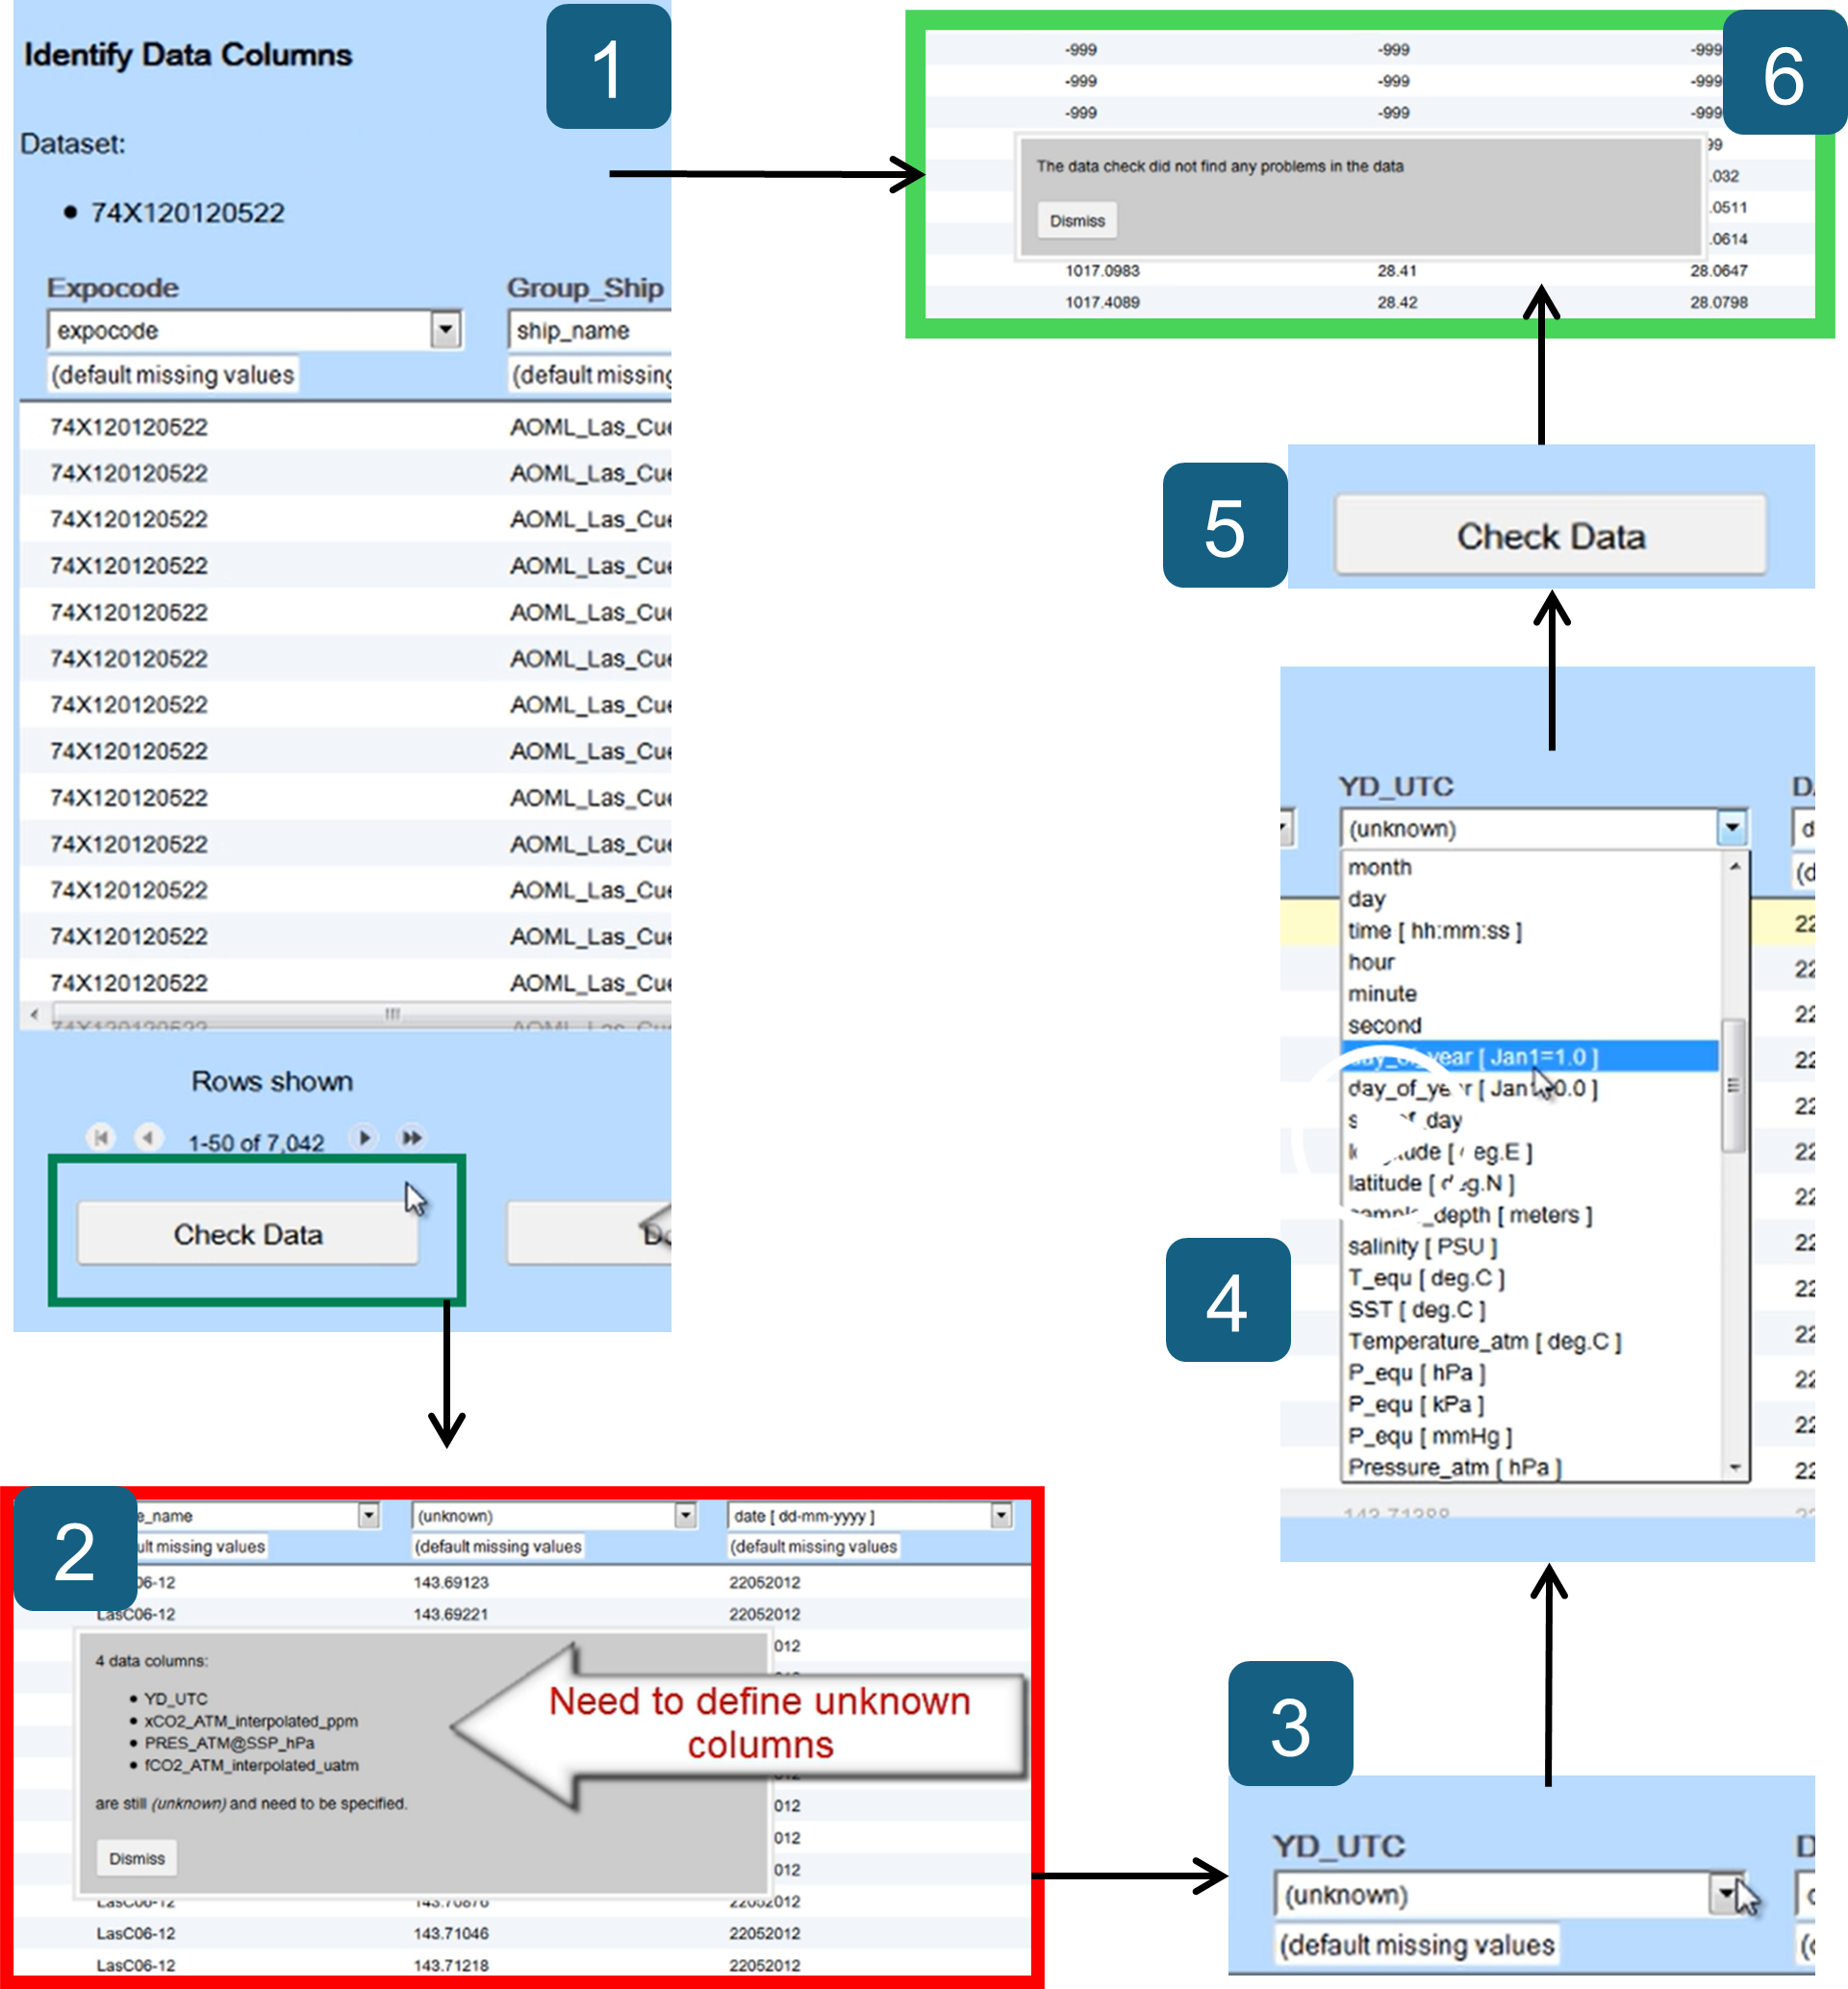
You will be redirected to a page called “Identify Data Columns”. The objective is to provide known names for the columns, so that the SOCAT system can harmonize them across all datasets. The data columns in the dataset(s) you upload will be identified from the data column headers, and the data will be checked for obvious errors.
By clicking “Check Data” in the lower left corner of the screen (1), the system will check the name of each column and automatically identify those that are unknown to it.
The system detects unknown column names and asks you to define them. Click “Dismiss” (2) and proceed as follows: for each unknown column, click on the arrow on the right (3) and select the appropriate pre-registered name (4). Repeat this step until all columns have known names (3 and 4). Click “Check Data” again (5). If all columns are now known, the system will display the message “Data check did not find problems in the data”. Click on “Done”.
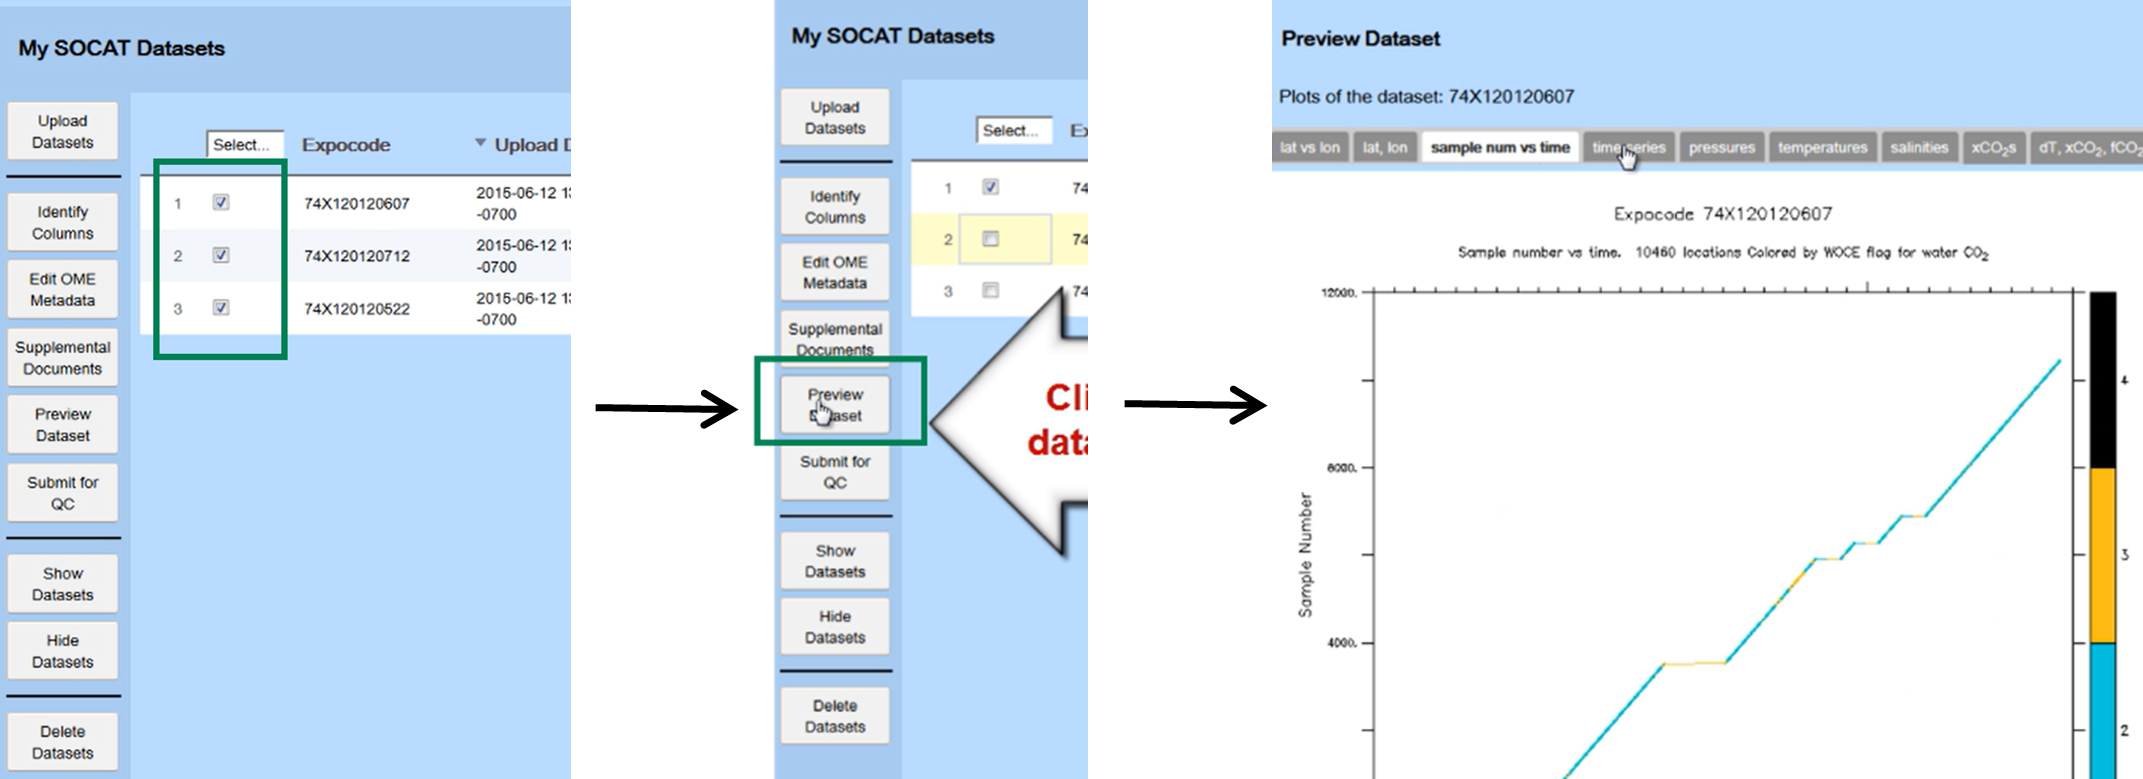
A set of plots of the data (the “Preview Plots”) is available to help detect inconsistencies or other errors in your data. After uploading the data for a dataset, you should examine plots of your data on the “Preview Data” page. Back on the main page of the Dashboard, please select one dataset and preview it by navigating through different pre-defined plots. In the left menu, select “Preview Dataset”. After a short loading period, all available pre-defined plots will appear. We invite you to navigate through them and evaluate whether aberrant values or behaviors are present in the dataset.
If you discover errors that need to be corrected, you should correct your data file and re-upload the updated dataset. Sometimes the error may just be a misidentification of a data column, its units, or its missing value. In this case, you can correct the identity of the data columns in the Dashboard without having to upload the data.
If you are satisfied with the data, please click “Done” at the bottom of the page.
The video below shows the tool in action and guides you through its usage.
To submit a dataset to SOCAT, you also need to upload one or more metadata files describing the data and how they were obtained. Before you submit a dataset for SOCAT, you must provide metadata. This metadata should identify each of the data columns in your data file (including data columns that are marked as “Other” data types) and describe details of how the data was collected.
Metadata Editor
You are invited to provide metadata using the Online Metadata Editor (“OME”) for SOCAT. On the main page of the Dashboard, please select “Metadata Editor” on the left.
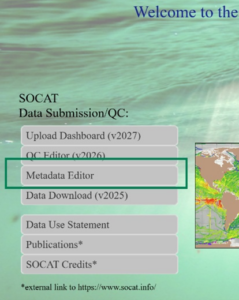
If you use the editor for the first time, or if you use new equipment requiring different metadata, click on each category on the left and complete the form in full. If you fill in all spaces indicated in red (mandatory to submit for SOCAT), it will be sufficient metadata for the community. The first step is to enter an expocode in the matching field. A full step-by-step tutorial is available in the Tutorial section to guide you.
The metadata file is uploaded to the Dashboard using the “OME Metadata” page (see below). When OME metadata are provided, the date and time of the upload are displayed in the “OME Metadata” column in the Dashboard dataset listing. An easy-to-read document will be generated from the OME XML file you uploaded, and this document will be available for the scientists performing quality control for SOCAT. The OME XML file will also greatly simplify archiving your dataset at NCEI if you choose to do so.
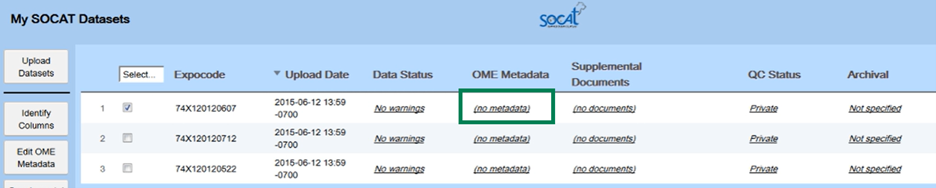
For the dataset you are working on, select “No document” in the “Supplemental Documents” column.

The supplemental documents you upload will be submitted and associated with the dataset(s) you selected; the contents are not examined or modified in any way. Because of this, the uploaded files should be in standard formats that will be easy to read by scientists performing quality control for your cruise.
The Supplemental Documents page can also be used to update (by just uploading or deleting any supplemental documentation.
Once Metadata has been uploaded, it’s time to submit the dataset and metadata to SOCAT for the QCing step.
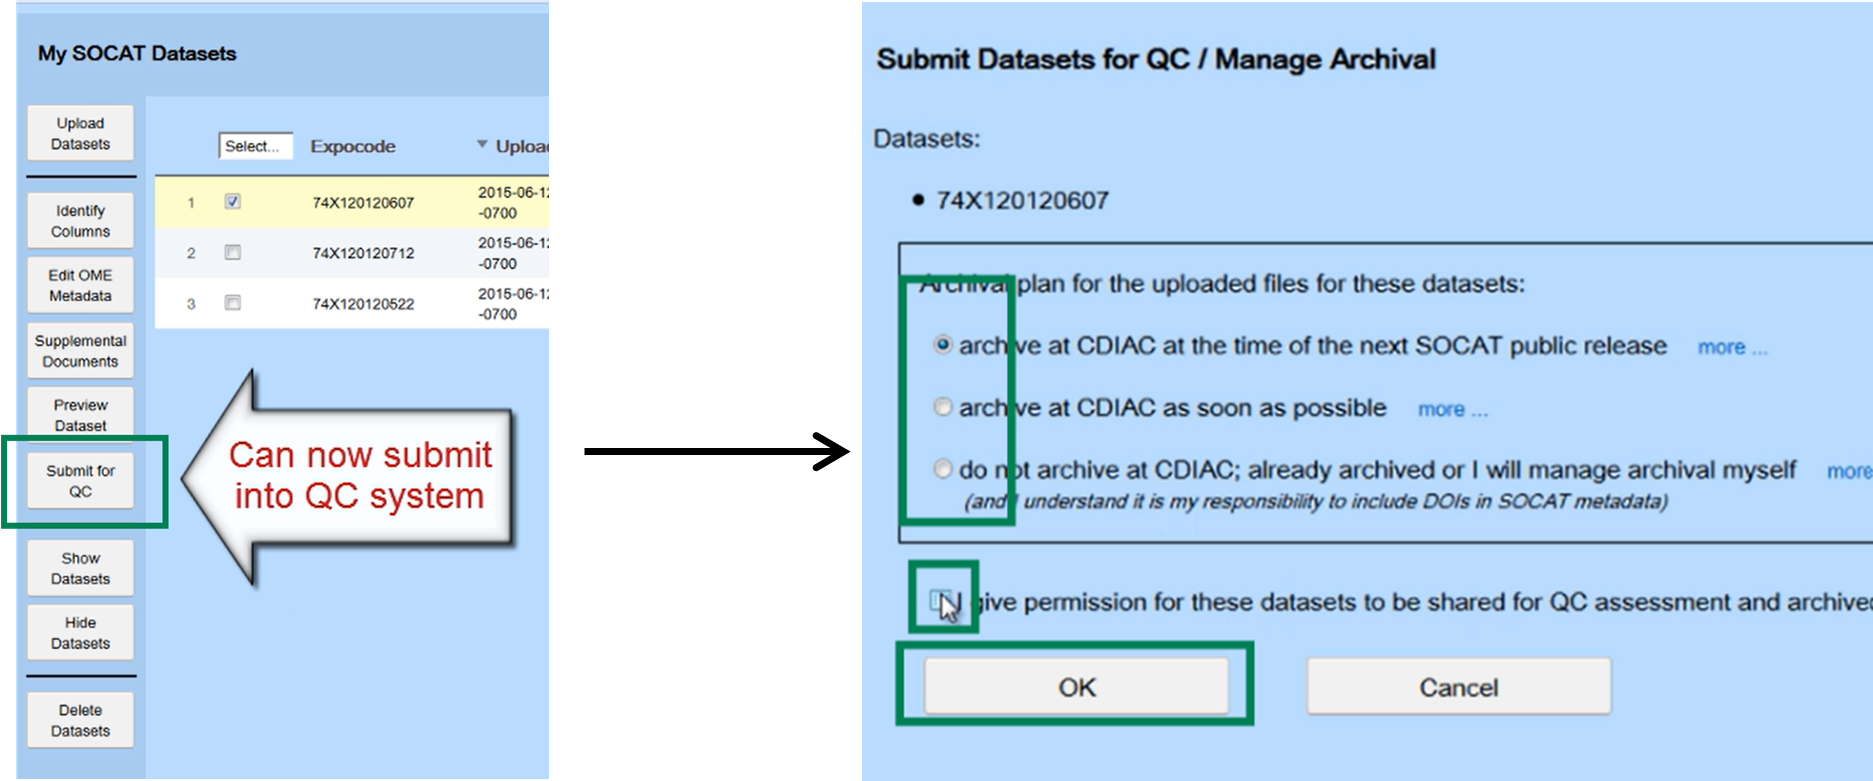
In the left menu of the Dashboard, select “Submit for QC”. You will be asked to choose between repository options. Select the one that is the most appropriate for your situation.
Please check the box allowing SOCAT to review datasets. Click “OK”. Your dataset is submitted.
Which option choosing ?
-
-
-
- Since all the data used for SOCAT must be archived, you are presented with three options for archiving the dataset you uploaded to SOCAT.
The first and the default is to have the data archived at NCEI when the next version of SOCAT is released. This option allows SOCAT scientists to examine your data, possibly resulting in corrections or additions to your data or metadata files, before the dataset is archived. - The second option for archival is to archive at NCEI immediately. This option makes your uploaded data and metadata files available to the public as quickly as possible, but will also require resubmitting these files after corrections and other updates.
- The third archival option indicates that the dataset is already archived (such as when the dataset is already published), or that you will archive it at some standard data archival center (if you wish to archive it somewhere other than NCEI) before the next release of SOCAT. For this option, we request that you provide the DOI or other archival reference to the dataset in the metadata you provide to SOCAT so we may properly cite your dataset within SOCAT.
- Since all the data used for SOCAT must be archived, you are presented with three options for archiving the dataset you uploaded to SOCAT.
-
-
Once a dataset is submitted for QC, you are limited in what you can do with the dataset on the Dashboard. You can always modify your data archival option given on the “Submit for QC page”, reexamine the data-check results from the “Identify Columns” page, and re-examine the preview plots of your data from the “Preview Dataset” page. However, you will not be able to update the data or the data types while a dataset is submitted for QC.
If you need to update the data, the dataset needs to be suspended using the SOCAT QC Editor. The QC status in the Dashboard will then change to “Suspended” and you can modify the dataset as desired. When you are done with your changes, you then submit your dataset for QC once again.
If you only need to update the metadata for your dataset, either to correct errors or to add missing information to improve the QC rating, you do not need to suspend the cruise. Instead, use the “Edit OME Metadata” or “Supplemental Documents” page to modify, delete, or add the metadata documents as desired. When the metadata documents are modified, the dataset will be marked as updated in the QC editor (and thus needing to be QC’ed again), but since the data has not been modified, any WOCE flags that had been assigned to the data itself will remain in place.
- To ensure file harmonization and interoperability, we encourage as many contributors as possible to use the integrated metadata tool.
For any comments or suggestions, please contact us. Your feedback is much appreciated.